> For the complete documentation index, see [llms.txt](https://docs.aqua-cloud.io/documentation/llms.txt). Markdown versions of documentation pages are available by appending `.md` to page URLs; this page is available as [Markdown](https://docs.aqua-cloud.io/documentation/product-updates-for-public-and-private-clouds-customers/product-updates/2023/23.70.0-public-and-private-clouds.md).
# 23.70.0 - public and private clouds
Guidelines
Version 23.70\
Date: 04.07.2023
### AI | Narrate the ideas and convert your speech to a requirement
Useful when:
* You don’t have time to create or update documentation for your project
* You want to create comprehensive documentation for the tech team
* You need to make sure that all aspects of the product requirement document are covered
* You are looking for a tool that provides an option to help junior specialists to write high-quality documentation
Guide:
First, you need to create a new requirement.
Once the requirement is created, click the ‘Narrator’ button on the ribbon.
The system will ask you to grant access to your microphone. You need to enable it only once by clicking the ‘Allow’ button.
Once you enable it, the recording will start automatically without any other actions needed from your side. Just start narrating your thoughts. At first, it might be a bit awkward, but just give it a few tries until you get used to it. As soon as you record a few thoughts, you'll see how easy and convenient it is.
You can always discard recording by clicking ‘Cancel’ or simply closing the pop-up. To stop recording, you need to click the ‘Stop’ button.
When the recording is stopped, the aqua AI will be triggered to analyse what has been narrated and in a few seconds start generating the product requirement document. Your recorded audio is kept temporary to generate a PRD and then removed once it's done.
Wait for a few seconds and then review the result. If you are happy with the created PRD, click the ‘Apply’ button.
The generated document will be automatically added to the description field of the requirement. You can easily extend or edit the created document.
Moreover, aqua AI also adds the narrated notes as a ‘Background’ to the requirement, so you can always read what you have said, tweak it or extend it the text and then narrate it once again while reading the text, but already with the added details to create another version of PRD.
\
Last but not least, don’t forget to save a requirement to keep the document.
Besides, if you want to create a test case based on this requirement, click the ‘Copilot’ button. aqua AI will start analysing the document and create a test case based on it.
{% hint style="info" %}
Note: aqua doesn’t store your recorded audios, and they are kept for PRD generation only. When the requirement is generated and saved, the audio recording is deleted.
{% endhint %}
### AI | Saving context provided to the AI Copilot (test case generation) on a project level
Useful when:
* You have a complex or unique project with special terms that are essential for proper test case generation, and you want to save this data
* You want to provide some additional data for AI Copilot to make test case generation more accurate, and it’s permanent.
* You have many projects, but you want to preserve the provided data for test cases generation for each project individually and want aqua to save it.
Guide:
When you generated a test case, before quitting the pop-up, click on the ‘Expand’ button.
The section with the context will open.
Provide all information that you want aqua to store for further test case generation and either close the pop-up or simply trigger the test case creation once again.
From now on, whenever you’ll start the AI Copilot, it will take the context into account.
In case you need to modify or update the background information, just substitute the previous data with the new one. AI Copilot will incorporate the recent information for future test case generations.
### Jira | Improved flows for connecting Jira issues with aqua test executions and aqua items
Useful when:
* You want to connect an already existing Jira issue to the test execution
* You want to create a Jira issue from aqua item and add it as a dependency
* You want to connect multiple Jira issues at once to aqua test execution or aqua items
Guide:
To connect existing Jira issues to aqua tickets, you need to set up the integration with Jira first. Follow this [guide](https://aquacloudio.zohodesk.eu/portal/en/kb/articles/configuration-in-aqua) to get started in less than 5 minutes.
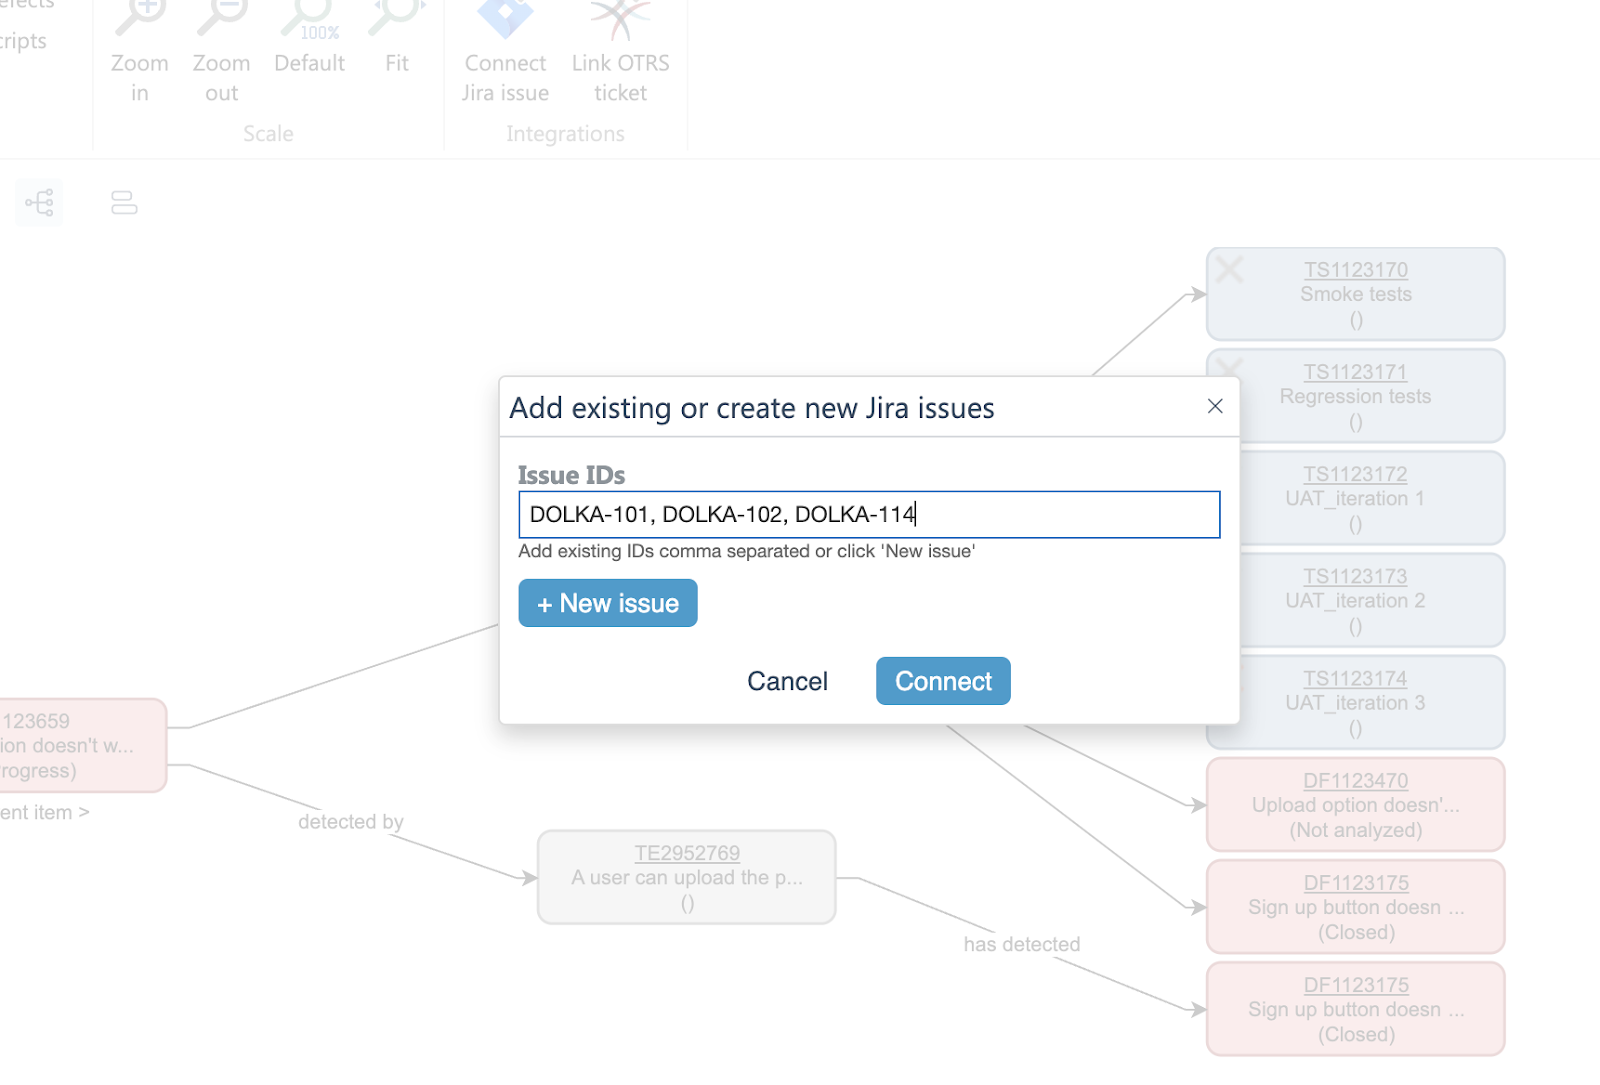
Once the integration is in place, open the desired aqua item, navigate to the ‘Dependencies’ tab, and then click the ‘Connect Jira issue’ button.
When the popup opens, provide the IDs of the Jira issues (separated by commas) and then click the ‘Connect’ button.
\
All referenced issues will be linked to the target aqua item.
{% hint style="info" %}
Please note, there is a limit of 10 IDs that you can provide at once. You will be able to link more items by going through the same steps again.
{% endhint %}
In case you want to create a new Jira issue and link it to the aqua item, just click the ‘New issue’ button and, once you save it on the Jira side, go back to aqua and provide the ID.\
You can use the same flow to connect multiple existing or new Jira issues to aqua’s test executions. Just click the same ‘Connect Jira issue’ button on the test execution or test execution details page.
### Ranorex | Handle links in project to external files in Ranorex scripts
Useful when:
* You want to link to external files in your project in Ranorex scripts
Guide:
In Ranorex Studio, open the desired project and navigate to the script's subfolder. Then right-click the subfolder and select the ‘Add’ option.
From the context menu, pick ‘Existing item’ and, once you select the file, click the ‘Link’ button.
{% hint style="warning" %}
Please note: when you link external files to multiple projects, you need to remember that it’s now dependent on the linked files that are not managed by aqua. As a user, you need to make sure that these files are located in the same place where they were originally linked from.
{% endhint %}
For example, if you developed the script on machine A, the linked file must be accessible in the exact same location on machine B in order to run the script there. aqua only establishes the link to the file and doesn't handle actual access to the file.
### New change log widget for Cloud users
The new changelog widget is available for all Сloud users and doesn’t require any action from the user side.
It was introduced as a part of aqua renovations. We will be notifying you about important changes, planned releases, new features, upcoming events and other updates in aqua to keep you informed and stay open to feedback.
Whenever the news is published, there will be a red dot next to the button, indicating that there is an unread message.
Click the ‘What’s new’ button, and the pop-up with the recent updates appears. Click on the title to see the full details.
### New aqua home page
With the new aqua home page, you can get much easier access to all aqua offerings, partners and products. You can also find documentation or contact our customer support here.
It doesn’t require any actions of cloud users, for on-premise customers we are preparing a separate document on how it can be configured and enabled.\
In case you don’t have these feature guidelines at hand in the future, we got you covered. You can find all the information on the new features in our [aqua wiki.](/documentation/web-client/getting-started.md)
---
# Agent Instructions
This documentation is published with GitBook. GitBook is the documentation platform designed so that both humans and AI agents can read, navigate, and reason over technical content effectively. Learn more at gitbook.com.
## Querying This Documentation
If you need additional information that is not directly available in this page, you can query the documentation dynamically by asking a question.
Perform an HTTP GET request on the current page URL with the `ask` query parameter, and the optional `goal` query parameter:
```
GET https://docs.aqua-cloud.io/documentation/product-updates-for-public-and-private-clouds-customers/product-updates/2023/23.70.0-public-and-private-clouds.md?ask=&goal=
```
`ask` is the immediate question: it should be specific, self-contained, and written in natural language.
`goal` is optional and describes the broader end goal you are ultimately trying to accomplish on behalf of the user. GitBook uses it to tailor the answer towards what is most useful for that goal.
The response will contain a direct answer to the question and relevant excerpts and sources from the documentation.
Use this mechanism when the answer is not explicitly present in the current page, you need clarification or additional context, or you want to retrieve related documentation sections.