> For the complete documentation index, see [llms.txt](https://docs.aqua-cloud.io/documentation/llms.txt). Markdown versions of documentation pages are available by appending `.md` to page URLs; this page is available as [Markdown](https://docs.aqua-cloud.io/documentation/automation/desktop-client/ranorex.md).
# Ranorex
A functional test is applied in the context of a test case in aqua. Therefore, the user has to create a new test case first. By selecting the *Automation* tab, the *Step Designer* switches to test automation. Now, create the necessary test steps in the *Step Designer*. An automated test may consist of multiple test steps and may contain multiple automation scripts, which are executed in the order of the test step index. Test scripts that were previously created, may be reused by using the *Script Library*. Initially, a single test step is sufficient.
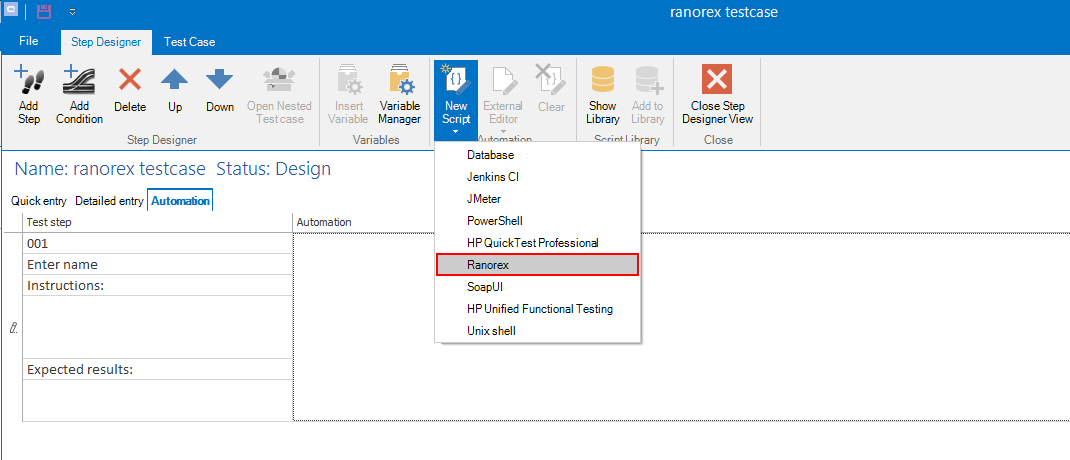
Select your single test step by clicking into the white area in the column *Automation*. To create a Ranorex-Test script, click on *New Script* and then select *Ranorex*.
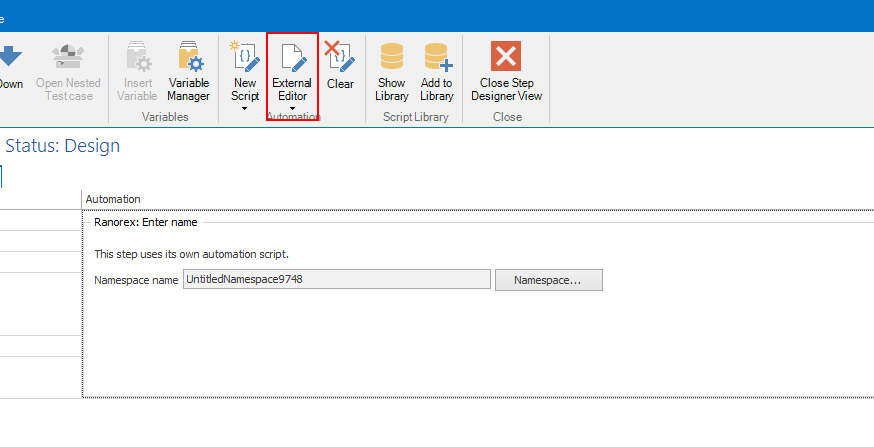
A test script template is now created and can be edited using the *External Editor - Ranorex Studio. Ranorex Studio*, for example, allows you to create a new automation by recording user interactions.
{% hint style="warning" %}
NOTE:
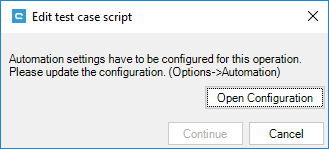
If you have not already worked with the automation tool, aqua will point out that the path to Ranorex needs to be configured. The corresponding menu is offered to you by the system. In this case click on "*Open Configuration*". Then select the path to the *Ranorex application*.
{% endhint %}
Test cases must be saved before they can be transferred. If you have saved the test case, you can open Ranorex with the "*Continue*" button.
By clicking on *External Editor*, a blank project will be opened in *Ranorex*. Test cases can be recorded and edited here. aqua is on hold, until the external editor is closed. If the automation is completed and the editor is closed, aqua offers the option of saving the new test case.
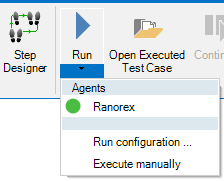
By saving the new test case, it will be automatically added to the database. If you don’t want to accept the changes, do not save the test case. To run an automated test, the test case must be executed in the same way as the manual tests. Open the test case and click on the *Run* button. If this is an automated test, and if agents are available in the network, then a selection of possible test systems will be displayed.
The results will be automatically transferred to aqua and then displayed to the user.
## **Parameterize**
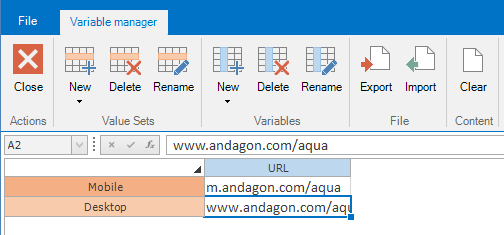
You can parameterize your Ranorex test cases by using aqua parameters. To do so, open the Variable Manager and insert some variables.
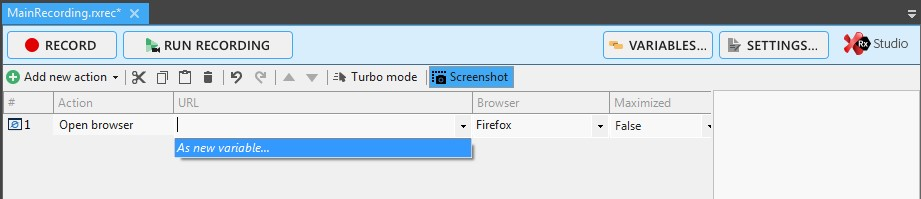
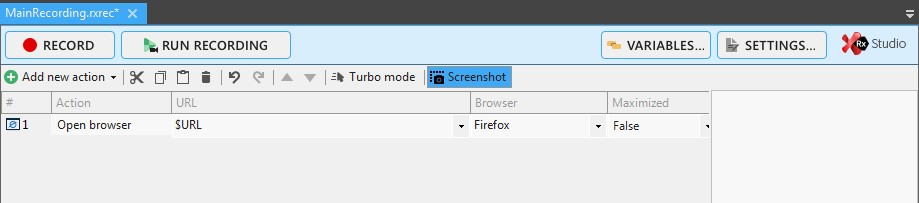
Go into Ranorex and add a new Action as shown below:
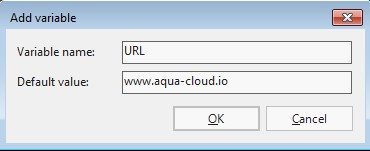
Now, you can add your variable to URL by clicking on  in the URL and selecting *As new variable*. A window will open where you can enter the name of the variable. This must correspond to the spelling of the variable name in aqua (in our case "URL").
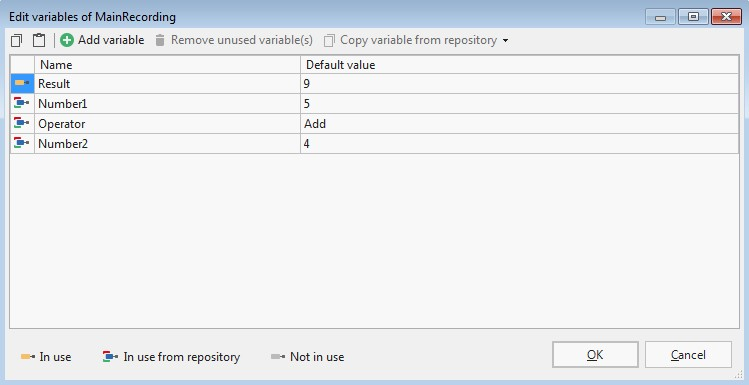
Your test case is now parameterized. The result is displayed below.
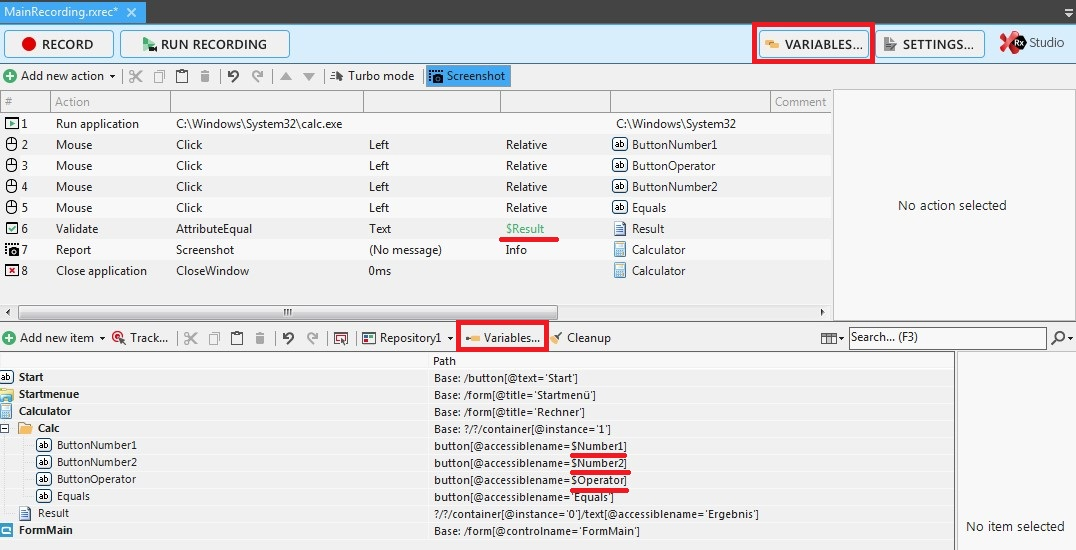
You can also use the "*Variables*" button to add new variables in Ranorex and use them within the actions. To replace the variables with the aqua variables, the naming must always be the same in both tools.You can also use variables in the Ranorex repository in the same way (e.g. to open certain windows or to control buttons on an application depending on the variables). These variables can be replaced by aqua variables as well, if the naming is the same.
Below is an example for the use of variables at different places:
## **Configuring the Agent**
Extract the RanorexAgent-\*.zip and open aquaAgentRanorexGui.exe.config.
Here you have to set the Agent Code and the aquaServiceUrl. In the following, you will find an example:
```xml
```
## **Working with Ranorex**
Here are some best practice tips for working with Ranorex and aqua. This page will show how to use one repository in several test cases. First, create a new test case in aqua and add a test step with a Ranorex script. This script will contain the repository.
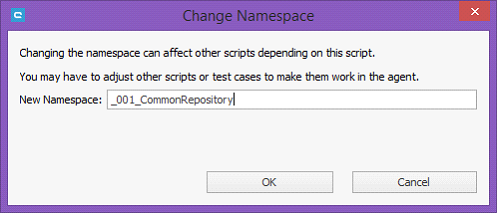
Create a namespace to identify the repository.
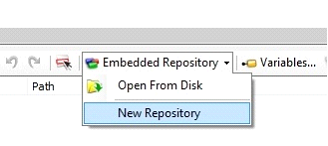
Open Ranorex as external editor and create a new repository in Ranorex.
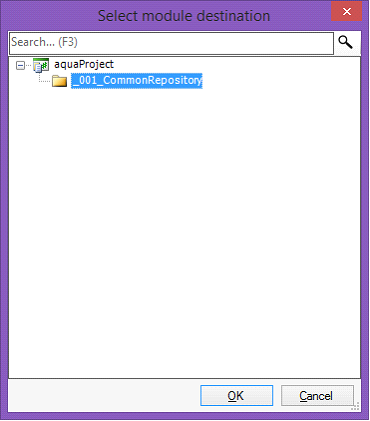
Save the repository in the module folder.
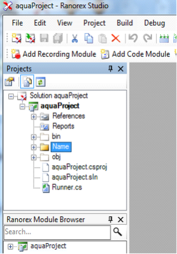
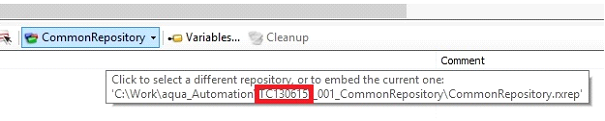
Take note of the folder where the repository is saved. The path should look like this:\\aqua\_Automation\TCxxxxxx\\\_001\_CommonRepository\CommonRepository.rxrepHover over the repository to see the path (see screenshot below).
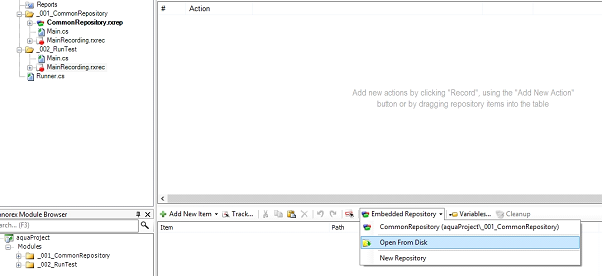
This repository can be used in another test step as follows: first add a new test step in aqua. Now open *Ranorex* with the *External Editor* button.
In Ranorex choose Open from Disk to select the repository created earlier.
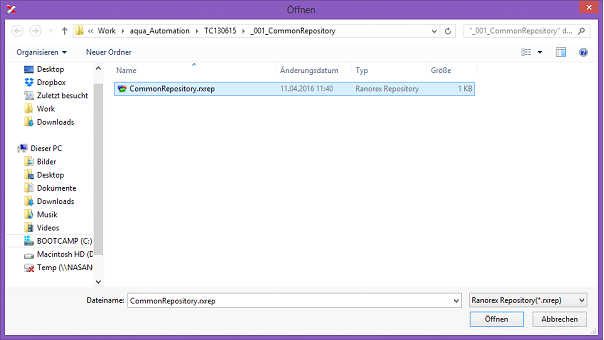
Browse to the path where the repository file was saved.
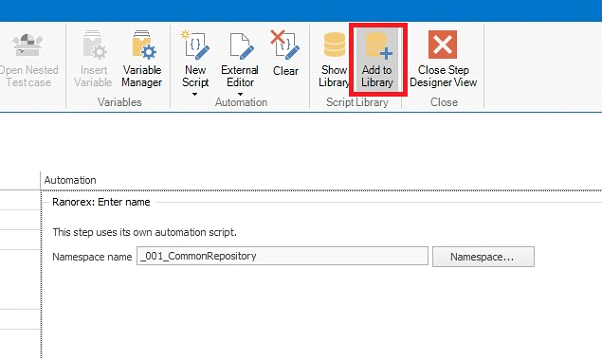
Now we want to also use our repository in another test case. To do so, we add the script containing the repository to the aqua script library.
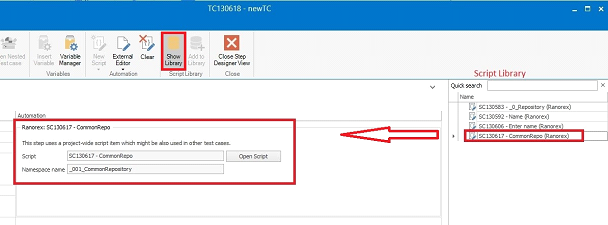
Now, we create a new test case and open the script library (*Show Library* button). Then, just drag the script to the white area in the test step.
Add another step with a *Ranorex* script to the new test case and open this step in *Ranorex*. Use the repository by selecting *Open from Disk* and browsing to the folder where the repository is stored (note: This is the folder of the first test case).
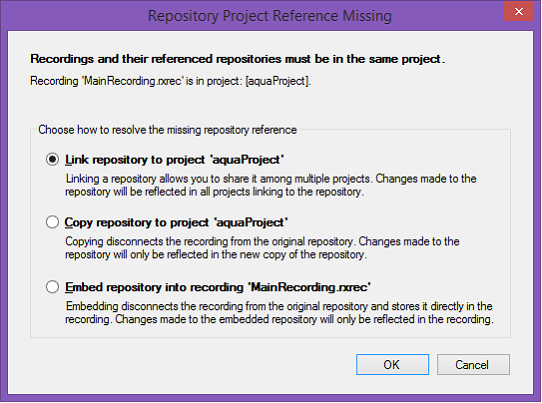
Ranorex will ask you to choose a reference for the repository. *Choose Link* repository to project. The repository is now shared between the two test cases. Any changes you make to the repository within this test case will be reflected in the other test case.
In this way, one repository can be used in all your test cases being tested in the same system under test.
{% hint style="info" %}
Note: If more than one test case referencing the repository is opened in aqua, it will be write-protected.
{% endhint %}
## **Troubleshooting**
### **Troubleshooting with Administrator Rights**
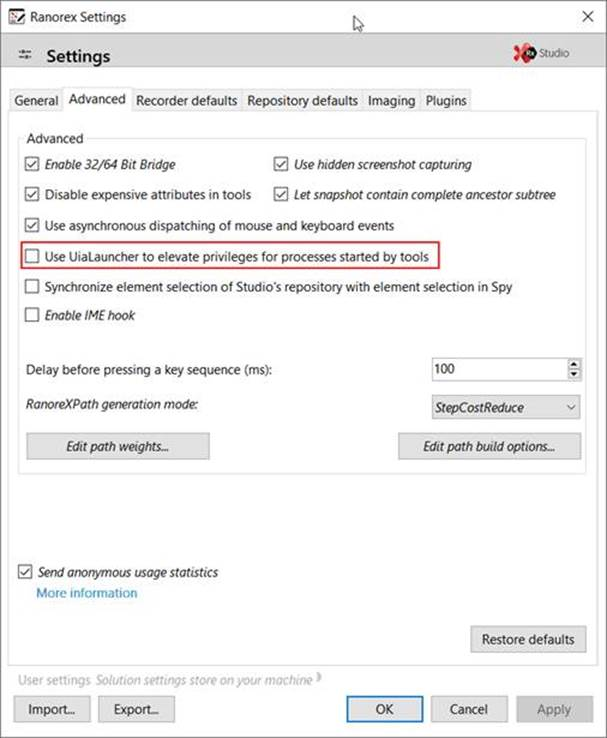
Ranorex starts with elevated rights per default. If you do not use aqua with elevated rights, this might lead to unexpected behaviour. To avoid this, open the settings of your ranorex studio and deactivate the following option.
### **Troubleshooting with Environment**
Build started 12.04.2016 09:27:08.
Project "C:\Users\\\*\Desktop\aquaRanorexAgent-16.1.2.0\aquaRanorexAgent\temp\PEE42\aquaProject.csproj" on node 1 (Clean;Build target(s)).C:\windows\Microsoft.NET\Framework\v4.0.30319\Microsoft.Common.targets(609,5): error : The OutputPath property is not set for project 'aquaProject.csproj'.
Please check to make sure that you have specified a valid combination of Configuration and Platform for this project. Configuration='Debug' Platform='BPC'. You may be seeing this message because you are trying to build a project without a solution file, and have specified a non-default Configuration or Platform that doesn't exist for this project.
\[C:\Users\\\*\Desktop\aquaRanorexAgent-16.1.2.0\aquaRanorexAgent\temp\PEE42\aquaProject.csproj]Done Building Project "C:\Users\\\*\Desktop\aquaRanorexAgent-16.1.2.0\aquaRanorexAgent\temp\PEE42\aquaProject.csproj" (Clean;Build target(s)) -- FAILED.
Build FAILED.
"C:\Users\\\*\Desktop\aquaRanorexAgent-16.1.2.0\aquaRanorexAgent\temp\PEE42\aquaProject.csproj" (Clean;Build target) (1) ->(\_CheckForInvalidConfigurationAndPlatform target) -> C:\windows\Microsoft.NET\Framework\v4.0.30319\Microsoft.Common.targets(609,5): error :
The OutputPath property is not set for project 'aquaProject.csproj'. Please check to make sure that you have specified a valid combination of Configuration and Platform for this project. Configuration='Debug' Platform='BPC'. You may be seeing this message because you are trying to build a project without a solution file, and have specified a non-default Configuration or Platform that doesn't exist for this project. \[C:\Users\\\*\Desktop\aquaRanorexAgent-16.1.2.0\aquaRanorexAgent\temp\PEE42\aquaProject.csproj]
**Solution**
Delete platform environment variable BPC on the windows os, where agent is running. [http://stackoverflow.com/questions/2507856/why-is-my-platform-environment-variable-defined-as-bnb](https://stackoverflow.com/questions/2507856/why-is-my-platform-environment-variable-defined-as-bnb) \
## **Referencing External Assemblies (.dll-Files)**
The csproj-file for editing and execution of test steps is built new every time according to the given test steps, to ensure the re-usability (keyword: script library) of test steps by aqua. Since several test steps are edited at once, it is hard to identify which reference belongs to which test step.
To solve that problem, please proceed as follows:
1. Localize the assembly in your file system, path will be like:
C:\Program Files (x86)\Microsoft Visual Studio 12.0\Visual Studio Tools for Office\PIA\Office15\Microsoft.Office.Interop.Word.dll)
2. Open the affected Ranorex test case in aqua
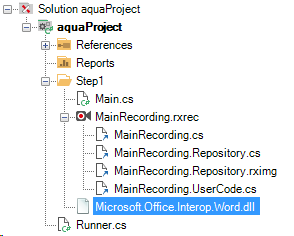
3. Copy the .dll-files into the test step
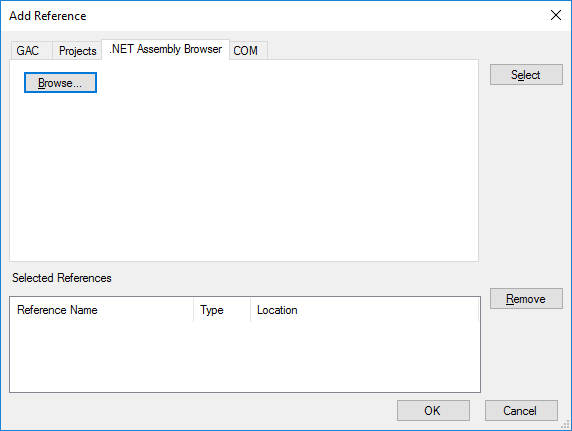
4. Add the reference to the local .dll-file in the test step, using the 'Browse...' button
5. Save and close the Ranorex project
6. Save the test case in aqua
When saving the test case in aqua the reference to the local assembly is automatically recognized and the assembly is saved in aqua.
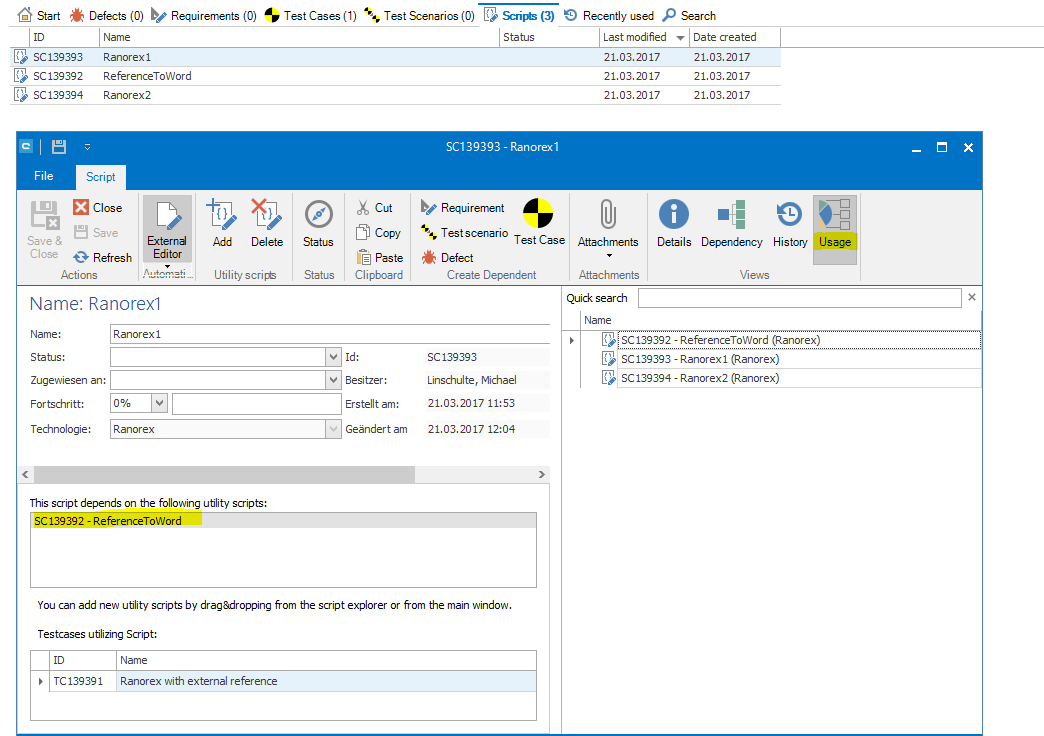
To simplify such references, you can use so-called utility scripts in script items. These are additional script items which can be added to scripts via the '*Usage*' button. Alternatively, place the reference script in the first test step.
The helper script for the references can contain more than one reference. Thus, you can build a whole library of references which are referenced multiple times. You do not need to create or link multiple scripts for each reference.
## **Migrating a project**
This manual describes how to migrate test cases which are automated with Ranorex from one aqua Server to another.
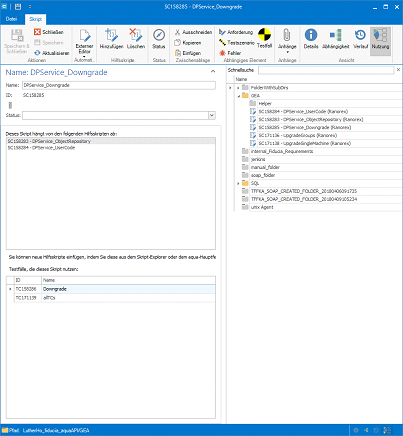
1. Create the same scripts (Same Name and Namespace!) on your target system, like on your source system.
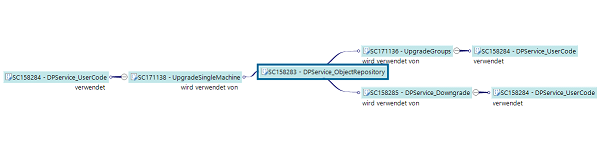
2. Create dependencies between the scripts. This makes sense, especially to reuse the repository and the user code module.
3. Create a test case which contains all scripts on both aqua environments.
4. Export the variables of the original test cases via the variable manager on the source system
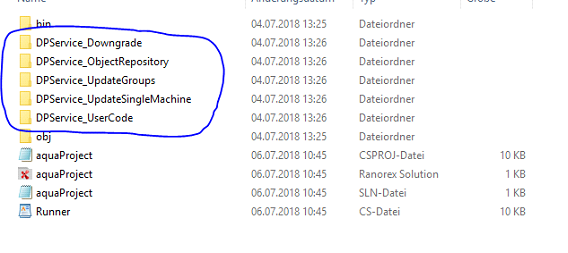
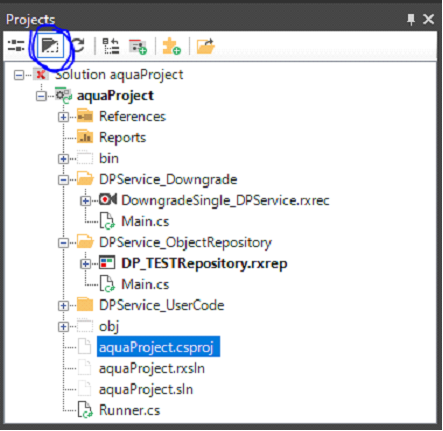
5. Open the external editor (Ranorex) on your source system and open the folder, which contains the solution (Right-click on solution --> Open folder).
6. Copy this folder and delete the Main.cs file in all sub folders which contain scripts.\
7. Open the test case you created in step 3 on your target system.
8. Open the folder which contains the solution and copy the folder you copied in step 6 to this destination (without Main.cs files!).
9. If the correct recordings are not found, show them via the button *Show all* files and add them to the project (Right click --> Include in Project).
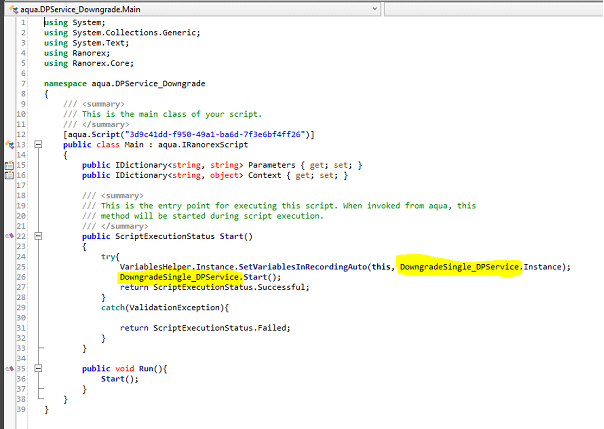
10. Edit the following to lines in the Main.cs files, so that the correct Recordings are called (yellow marked)
11. Compile the project in Ranorex. Close Ranorex and save the test case in aqua.
12. Create all test cases with the scripts in your target system and import the variables you exported in step 4 via variable manager.
---
# Agent Instructions
This documentation is published with GitBook. GitBook is the documentation platform designed so that both humans and AI agents can read, navigate, and reason over technical content effectively. Learn more at gitbook.com.
## Querying This Documentation
If you need additional information that is not directly available in this page, you can query the documentation dynamically by asking a question.
Perform an HTTP GET request on the current page URL with the `ask` query parameter, and the optional `goal` query parameter:
```
GET https://docs.aqua-cloud.io/documentation/automation/desktop-client/ranorex.md?ask=&goal=
```
`ask` is the immediate question: it should be specific, self-contained, and written in natural language.
`goal` is optional and describes the broader end goal you are ultimately trying to accomplish on behalf of the user. GitBook uses it to tailor the answer towards what is most useful for that goal.
The response will contain a direct answer to the question and relevant excerpts and sources from the documentation.
Use this mechanism when the answer is not explicitly present in the current page, you need clarification or additional context, or you want to retrieve related documentation sections.
 If you have not already worked with the automation tool, aqua will point out that the path to Ranorex needs to be configured. The corresponding menu is offered to you by the system. In this case click on "*Open Configuration*". Then select the path to the *Ranorex application*.
{% endhint %}
Test cases must be saved before they can be transferred. If you have saved the test case, you can open Ranorex with the "*Continue*" button.
If you have not already worked with the automation tool, aqua will point out that the path to Ranorex needs to be configured. The corresponding menu is offered to you by the system. In this case click on "*Open Configuration*". Then select the path to the *Ranorex application*.
{% endhint %}
Test cases must be saved before they can be transferred. If you have saved the test case, you can open Ranorex with the "*Continue*" button.