Configuration of the project notification templates

Customising email notifications in Aqua is a simple process. Follow these steps to customise the content of your email notifications to meet the needs of your project. Firstly, select your project in the project list, and move to the configuration menu by choosing the hamburger menu in the top left corner of the aqua header . Within the Project Configuration area, then choose 'Notification templates'.

How to navigate to the Notification templates configuration

Alternatively, you can right-click on the given project and select the 'Notification configuration' → 'Default notifications'

How to navigate to the Notification templates configuration using context menu

Here, you can define:

  • language,

  • subject,

  • maximum length of the item name,

  • content of the email.

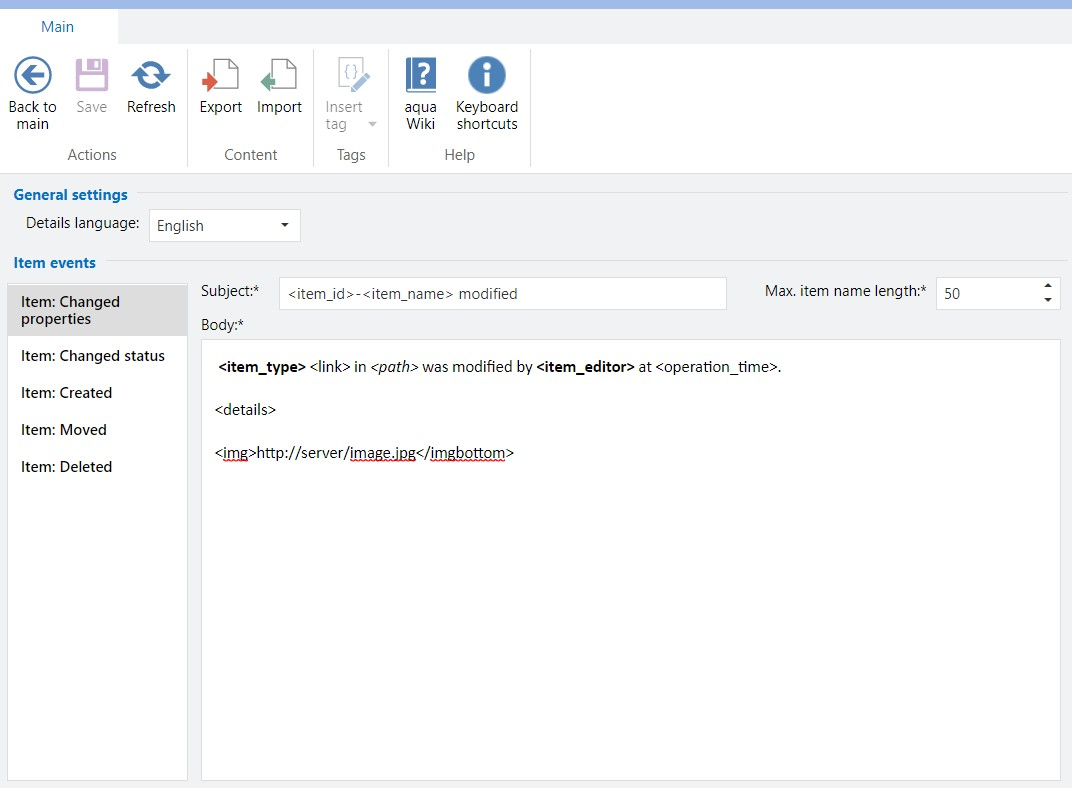
Notification template editor view

You can also use the 'Insert Tag' button to define a placeholder for the specified runtime data. The information will be replaced when the email is sent for the corresponding event. How to insert the link navigating to the items within the web client, see the following FAQ article. To customise the emails sent when a user is created or a password is reset, check the following FAQ answer.

Inserting Tag referring to the runtime data

Here are the notification templates available for download. To import them, go to 'Import' on the ribbon and select the appropriate data file.

Last updated

Was this helpful?