> For the complete documentation index, see [llms.txt](https://docs.aqua-cloud.io/documentation/llms.txt). Markdown versions of documentation pages are available by appending `.md` to page URLs; this page is available as [Markdown](https://docs.aqua-cloud.io/documentation/installation-for-on-premise/connection-to-mssql-database.md).
# Connection to MSSQL Database
In this chapter you will find detailed information on how to install and configure the MSSQL Database in order to connect your aqua server to the database. If you want to use an Oracle Database, please follow the installation steps described in the chapter Oracle Database.
### **Install MSSQL Database**
You can download a free version of MSSQL Database using the following link. However, please note that this version is limited to 10GB per Database. Hence, we do not recommend using this version for productive use and do not provide support in case your database has reached this limitation.\
\
[LINK](https://www.microsoft.com/en-us/download/details.aspx?id=101064)
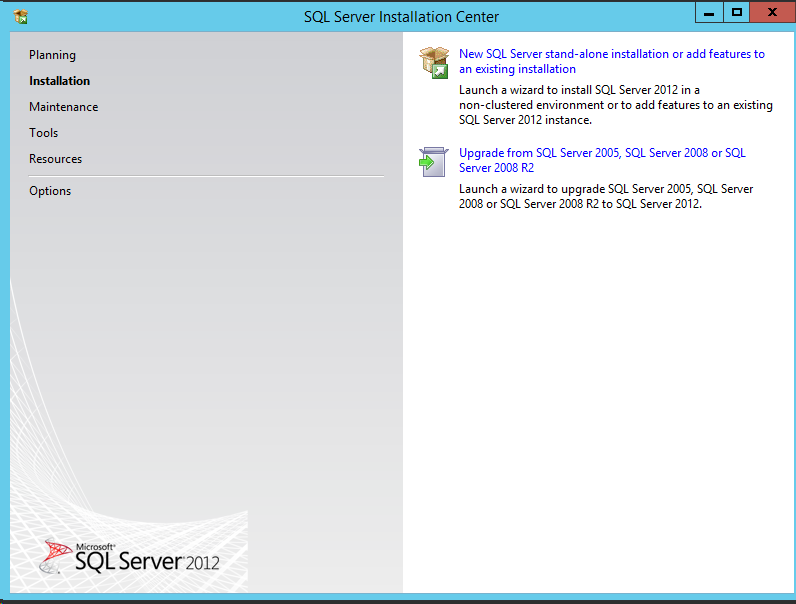
Then download **ENU\x64\SQLEXPRADV\_x64\_ENU.exe** Execute the file that the **SQL Server Installation Center** opens. Install a **New SQL Server stand-alone installation**.
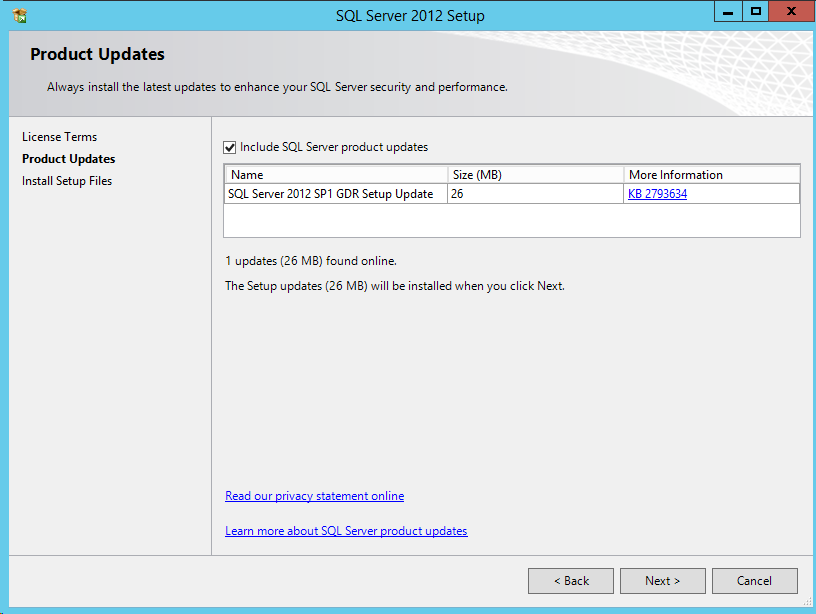
Read the license terms, accept them, and click on Next. It is possible to include SQL Server product updates if available.
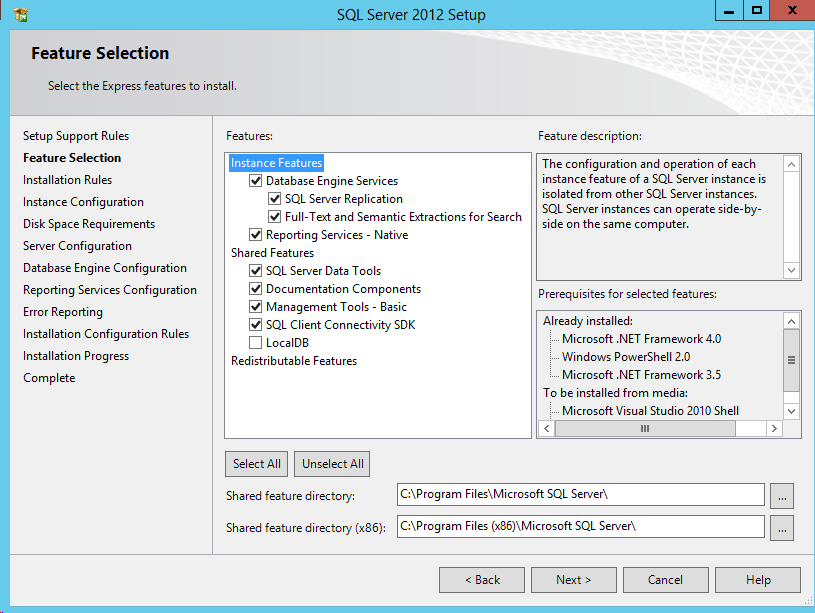
The updates are downloaded, extracted and installed in the next step. Now, the actual installation will start. Choose the following options and click on Next.
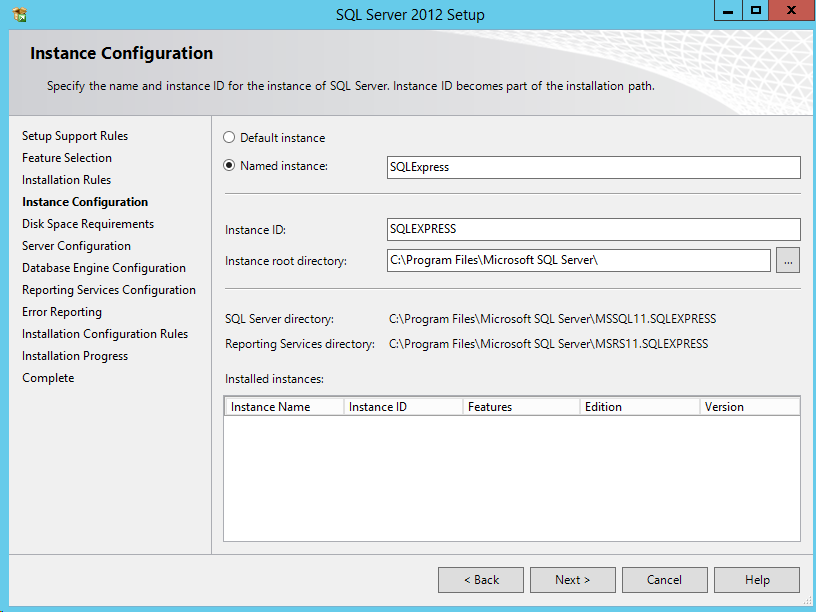
In the next window, the instance name is defined. The default value is **SQLExpress**. You may rename it, but be sure to remember this name for later configuration. This Wiki description continues to use the default value **SQLExpress**. After configuration, please click on Next.
In the following step, the database authentication mode is configured. For the setup, Mixed Mode is used and an Administrator password entered.
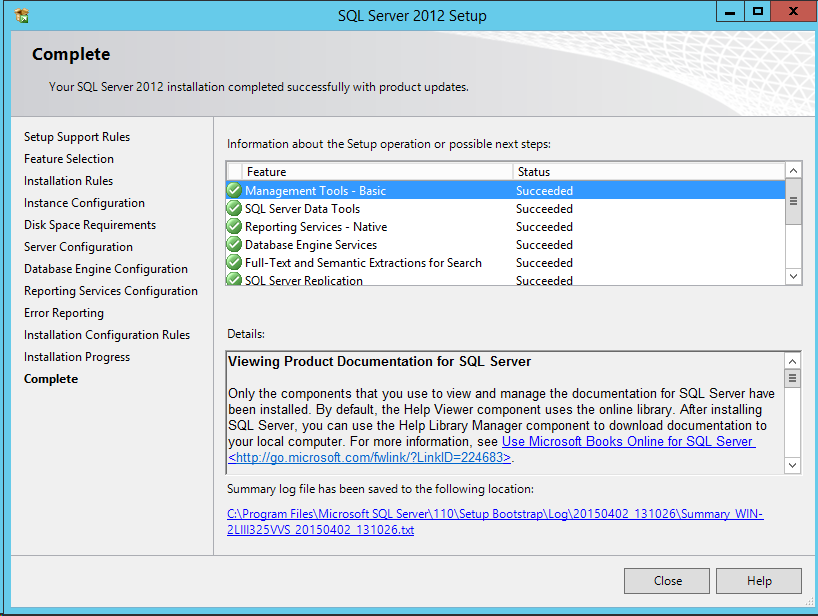
After that, proceed to the next step. In **Reporting Services Configuration,** chose **Install and configure** and click on Next. Then click on Next twice to begin the installation process. Finally, the installation is completed, and you can close the SQL Server 2012 Setup Window.
### **Database Configuration**
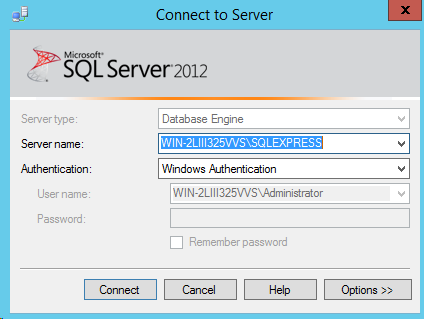
Open **SQL Server Management Studio** and login as Administrator.
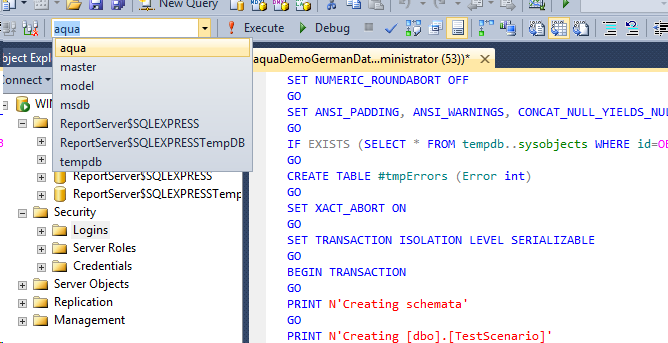
**Importing database**
You have received at least five SQL scripts in your installation package. They are numbered. Please execute all of them in their sequence. You can do so, by dragging and dropping the files into the SQL Server Management Studio. The first script creates the database, the db user and the necessary permissions and settings. The scripts 2-5 must be executed against the aqua database.
This can take about 10 seconds. After executing the queries, there should be a green hint, stating that the query was executed successfully.
**Configuring aqua Database Connection**
Connect the aqua server to your MSSQL Sever. In order to do so, open the following XML Configuration File with Notepad:
`C:\Programm Files\andagon GmbH\aqua for IIS\Web\Webservice\Web.config`
Your database connection is specified in the following line. Please change this line accordingly.
``
{% hint style="info" %}
If you are not using SQLExpress, please remove the '\SQLExpress' after the database name.
{% endhint %}
\
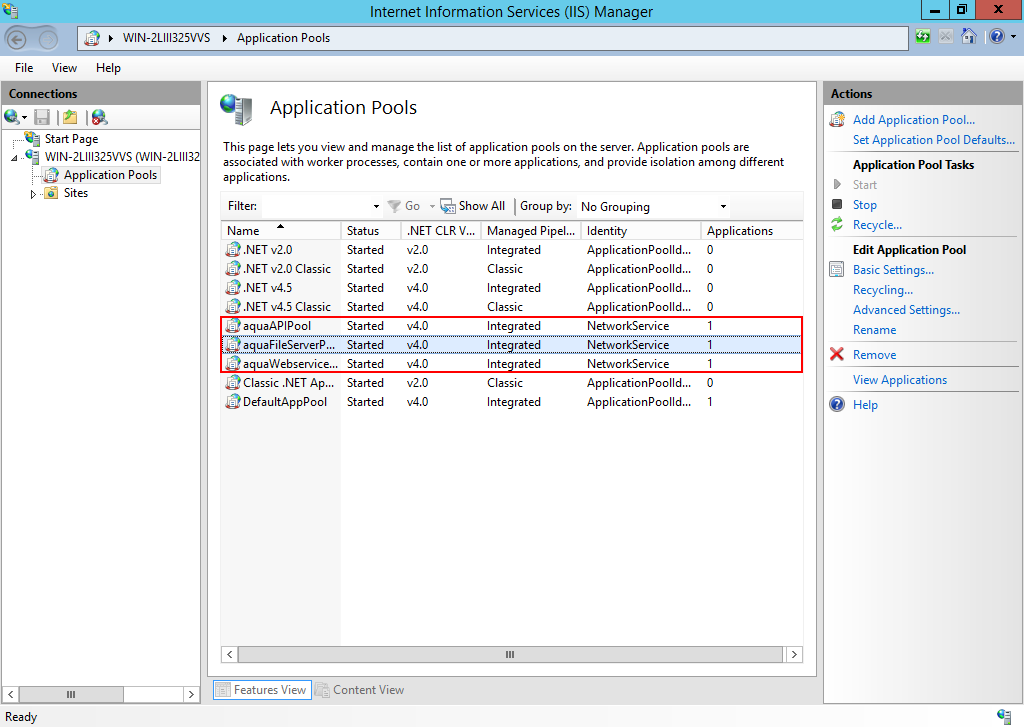
Now your aqua server is connected to the database. In order to start your aqua server, open the **Internet Information Service Manager** (in the following **IIS Manager**) and make sure that all three aqua Application Pools are started.
In order to check if an aqua client is able to connect to your aqua server, please install your aqua client locally on the server. In order to do so, install **aqua.msi**. Follow the instructions and complete the installation.
After installation, start aqua. A login screen will be displayed. Here you have to enter:
| Username: | Administrator |
| --------- | ------------- |
| Password: | aqua |
| Server: | localhost |
\
Try to **Log in** with the given aqua credentials.
---
# Agent Instructions
This documentation is published with GitBook. GitBook is the documentation platform designed so that both humans and AI agents can read, navigate, and reason over technical content effectively. Learn more at gitbook.com.
## Querying This Documentation
If you need additional information that is not directly available in this page, you can query the documentation dynamically by asking a question.
Perform an HTTP GET request on the current page URL with the `ask` query parameter, and the optional `goal` query parameter:
```
GET https://docs.aqua-cloud.io/documentation/installation-for-on-premise/connection-to-mssql-database.md?ask=&goal=
```
`ask` is the immediate question: it should be specific, self-contained, and written in natural language.
`goal` is optional and describes the broader end goal you are ultimately trying to accomplish on behalf of the user. GitBook uses it to tailor the answer towards what is most useful for that goal.
The response will contain a direct answer to the question and relevant excerpts and sources from the documentation.
Use this mechanism when the answer is not explicitly present in the current page, you need clarification or additional context, or you want to retrieve related documentation sections.